Key Topics:
- 2:56 – MEDIA MANAGER: Peels Free Stock Photos in Media Manager for All
- 2:56 – TEXT EDITOR: Pexels Stock Photos in Admin Text Editor for All
- 6:10 – POST IMAGES: Edit Alt Text & Filenames of Posts Images
- 8:28 – SMART LISTS: Total User Count Now Links to The Page with it’s Filters
- 10:54 – EXPORTS: Export Posts from “Manage Posts” Page
- 12:29 – CSS: Target Elements Using CSS for Logged-In Members vs. Regular Visitors
- 15:03 – PHOTOS: New Add-On to Extend the Free Stock Photo Access to Front-End (When Creating Posts)
- 15:57 – PROFILE TABS: Tidy Up Profile Pages with Design Setting to Scroll Excessive Tabs
- 16:42 – DIGITAL PRODUCTS: Ability for Members to Revisit Confirmation Pages and Emails
- 17:50 – TONS MORE: Speed, security, API, webhook, quality-of-life features and exciting new releases on the way!
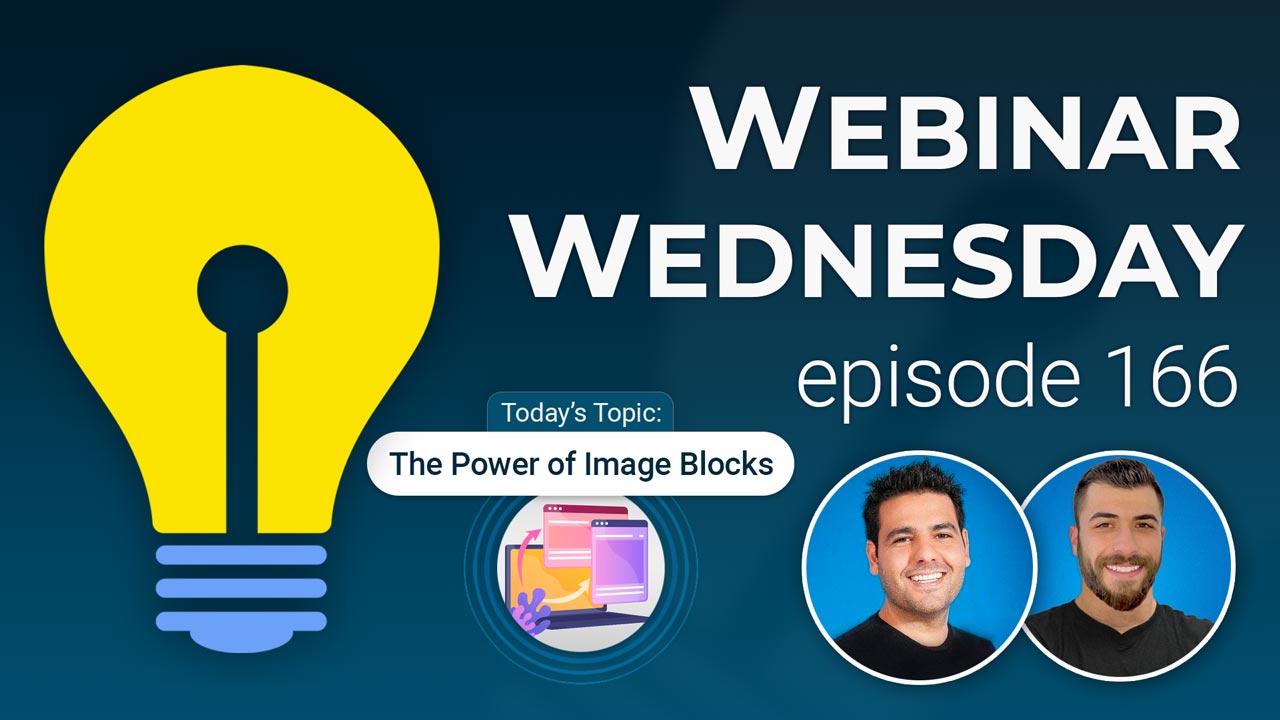
- 18:26 – The Power of Image Blocks to Enhance SEO & User Experience
- 19:18 – What are Image Blocks?
- 21:01 – Benefits of Image Blocks
- 22:09 – Common Placements for Image Blocks
- 25:03 – Let’s See Image Blocks in Use
- 33:42 – How to Use & Create Image Blocks
- 37:05 – Add Custom Content, Banneres & SEO Value To Search Result Pages
- 39:15 – How many stock photos are available in the library?
- 40:24 – How to change Twitter share icons to X?
- 43:55 – How to set location search radius?
- 45:44 – How to remove members’ street addresses from member search result page?
- 47:32 – Bookmark My Favorites text labels?
New Features
Coming Soon
Tip of the Week
Questions & Answers

 AI-Generated Transcript – Please excuse any inaccuracies
MEDIA MANAGER: Peels Free Stock Photos in Media Manager for All (00:02:56)
- The media manager and text editor now have free stock photos available for all users, which can be accessed in the admin area, both in the media manager and when working in the text editor (00:02:57).
- To access the free stock photos, users can go to the media manager in the M content section, where they will see a link to “photos by Pexels” and can search for images, choose their size, and download them to use on their website (00:03:24).
- The free stock photos are also available in the web page builder, where users can insert images into their landing pages by searching for images, choosing their size, and clicking the arrow button to insert the image directly into the page (00:04:41).
- In the text editor, users can replace default images in pre-made content blocks with free stock photos by clicking on the replace icon, choosing “Pexels”, searching for an image, and adding it to the block (00:05:28).
- The free stock photos can be used in various sizes, including small, medium, and large, and can be downloaded and added to the media manager for use throughout the website (00:03:57).
POST IMAGES: Edit Alt Text & Filenames of Posts Images (00:06:10)
- Editing alt text and filenames of post images can be beneficial for Search engine optimization (SEO), particularly when members upload images for blog posts, photo albums, or other content, and the system automatically assigns a unique filename and generic alt text that matches the post title (00:06:10).
- The alt text and filename can be edited to enhance SEO, and this can be done by going to manage posts, selecting the actions option, and choosing edit image data, which allows users to modify the image file name and add alt text (00:07:05).
- The image file name can be changed to something more descriptive, such as “Los Angeles Pizza coupon”, and alt text can be added to provide a description of the image, which will be used on the front end when the image is displayed (00:07:34).
- For photo albums with multiple photos, the edit image data option allows users to go through each photo and edit the alt text and filename, and if changes are made in error, they can be reverted back to the system default using a button (00:08:01).
- The ability to edit alt text and filenames is available for users who want to improve their SEO, and it can be done for various types of content, including coupon posts and photo albums (00:08:22).
SMART LISTS: Total User Count Now Links to The Page with it’s Filters (00:08:28)
- Smart lists allow users to create a segmented group of users who meet certain criteria, such as creating a group of California members who are inactive, and these lists have always had numbers indicating the list size, but until now, clicking on these numbers did not take users to the correct page with pre-filtered results (00:08:29).
- When creating a new smart list, the numbers were previously inaccurate and not linking to the correct pages, but now, when a new smart list is created, clicking on the list size number will take users to the correct page with pre-filtered results, showing the correct users (00:09:13).
- To get the correct functionality, users can simply recreate their existing smart lists, and the numbers will work correctly, showing the total count of users who meet the specified criteria (00:09:30).
- The updated smart list feature allows users to create a new smart list, such as one for members in a specific location, like Austin, Texas, and when clicking on the list size number, it will pre-filter the results to show only the members who meet the specified criteria (00:10:05).
- The new smart list feature has been recently released, and while there may be some small quirks or errors, such as the one experienced in the demo, these issues will be sorted out and fixed for the majority of users (00:10:43).
EXPORTS: Export Posts from “Manage Posts” Page (00:10:54)
- The ability to import posts via Comma-separated values and through Zapier has been recently released, and now it is also possible to Export to a CSV file, allowing users to save their blog articles for later use or make changes locally on their computer (00:10:55).
- To export posts, users need to go to the “Manage Posts” page, where they will see the export list of current post results based on the tab they are in and any filters they have set (00:11:24).
- The export feature is based on the tab that the user is in, so if they are looking at coupons, events, or discussions, that is what will be exported, and any filters set will also be applied to the export (00:11:37).
- The export data add-on is required to export posts from the site, which includes a wide array of areas where data can be exported from the site, and now includes the ability to export posts (00:11:57).
- If users export posts from their site and want to import them back, they do not need to modify the file as long as the author of the post, identified by their member ID, exists on the site they are importing to (00:12:18).
- The export feature allows users to export posts and then make changes locally on their computer, and then re-import them, making it a useful tool for managing and updating content (00:11:20).
CSS: Target Elements Using CSS for Logged-In Members vs. Regular Visitors (00:12:29)
- The process of hiding certain content on a site based on whether a member is logged in or not can be achieved using CSS, making it easier for designers and developers to do so without having to use PHP (00:12:30).
- A class is added to the body tag to indicate whether a user is logged in or not, with “user session” indicating a logged-in member and “General Session” indicating a regular visitor, allowing for the creation of CSS rules to target specific elements (00:13:07).
- CSS rules can be created to target elements such as buttons, menu links, images, and more, using classes like “General Session” to hide or show elements to logged-in members or regular visitors, with the example of a red button in the footer being hidden from logged-in members (00:13:37).
- The CSS rule to hide the red button in the footer is achieved by adding a snippet of CSS code that targets the button’s class and sets its display to “none” when the class is “user session”, effectively hiding it from logged-in members (00:14:29).
- This method of hiding elements using CSS is useful for visually hiding content without removing it from the source code, and can be used to achieve various objectives such as hiding menu links, images, or buttons based on a user’s membership status (00:14:55).
PHOTOS: New Add-On to Extend the Free Stock Photo Access to Front-End (When Creating Posts) (00:15:03)
- A new add-on is being introduced to extend free stock photo access to the front-end, allowing users to access these photos when creating posts, such as blog posts, event posts, or coupon posts, on their site (00:15:04).
- This add-on will enable users to quickly create content by marrying the free stock photo access with the chat Generative pre-trained transformer add-on, pulling stock photo images to complement articles and creating content efficiently (00:15:09).
- The free stock photo access will be available on the front-end, enabling users to create posts, such as blog posts, and utilize the chat GPT add-on to generate content rapidly (00:15:11).
- Site administrators will have the ability to grant access to the free stock photo library to specific membership plans or individual members, allowing them to use the library when creating posts (00:15:17).
- The new add-on is expected to be released soon, providing users with a convenient way to create content using free stock photos and the chat GPT add-on (00:15:20).
PROFILE TABS: Tidy Up Profile Pages with Design Setting to Scroll Excessive Tabs (00:15:57)
- The profile tabs are being tidied up with a new design setting that will be available for everyone, allowing for a more organized display of tabs on the member profile page (00:15:57).
- Currently, when there is an overflow of tabs on the member profile page, they are stacked underneath each other, which is not the most attractive layout (00:16:07).
- The new design setting will add slider arrows to the profile tabs, enabling users to slide through the tabs horizontally, keeping all tabs on the same row and line, and this feature will be accessible on both desktop and mobile devices (00:16:25).
- On mobile devices, users will have the option to use either the arrows or their finger to slide left and right through the tabs (00:16:35).
DIGITAL PRODUCTS: Ability for Members to Revisit Confirmation Pages and Emails (00:16:42)
- When members purchase digital products, they typically receive a confirmation email or are redirected to a confirmation page, but after the initial purchase, they usually do not have direct access to these confirmations anymore, although they can save them locally or check their email again (00:16:44).
- Members will have links in their billing history on the site to view the product page if it is still published, view the original confirmation page if it is still published and active, and see a popup of the confirmation email they received (00:17:07).
- The popup of the confirmation email will be based on the email template set for members to receive after purchase, allowing them to see a copy of the email right in their admin dashboard (00:17:25).
- After purchasing digital products, members will have a method to remember what they purchased, go back to the product page, and potentially repurchase it or take other actions (00:17:37).
- In addition to these features, there are many more options available to members, providing them with a range of possibilities for managing their digital products (00:17:49).
TONS MORE: Speed, security, API, webhook, quality-of-life features and exciting new releases on the way! (00:17:50)
- Updates are expected to be released, including improvements related to webhooks and the API, which will enhance data portability and sharing between platforms (00:17:51).
- The upcoming updates will also focus on speed, security, and quality-of-life features, aiming to make the platform more intuitive and easier to use (00:17:59).
- The community, particularly the Facebook group, has played a significant role in shaping these updates through their suggestions and recommendations, which are appreciated and acknowledged (00:18:10).
- The participation and feedback from the community are valued and have contributed to making the platform better (00:18:15).
- The updates are a result of the community’s input, and their participation is essential in continuing to improve the platform (00:18:19).
The Power of Image Blocks to Enhance SEO & User Experience (00:18:26)
- The topic of discussion is the power of image blocks to enhance both Search engine optimization and user experience, with a focus on utilizing dragable content blocks to create visually appealing web pages (00:18:32).
- Dragable content blocks were released to make it easy to add pre-made elements to web pages, allowing for the quick and easy creation of a visually appealing web page and experience for users (00:18:42).
- The use of image blocks can improve a website’s navigation by utilizing them in specific cases and areas on the website (00:18:59).
- Image blocks will be used to demonstrate specific use cases to show how they can be used to enhance SEO and user experience, with examples to be shown at the end of the discussion (00:19:08).
- A brief overview of general information about image blocks is provided before diving into the specific use cases, starting with the question of what image blocks are (00:19:17).
What are Image Blocks? (00:19:18)
- Image blocks are essentially pieces of content that contain a prominent, high-quality image linking the user to a related page on a website, allowing users to click into a portal-type experience and be funneled down a navigational pathway (00:19:20).
- These image blocks can be used in rows, with the recommended number being between three to six blocks per row, and they can also be stacked to create a table-like structure, with each block containing a prominent and high-quality image to make it visually appealing (00:20:02).
- The image blocks can include short informational text to further explain to users where they are being linked to, and can also include a button link to direct users to the desired page, with the option to click either the button or the image Josh Shapiro is not mentioned in the text, however, (00:20:27).
- The use of image blocks helps to create a more engaging experience for users, making them feel like they are clicking into a specific section of the website rather than just browsing through the main menu links or footer links (00:19:46).
- The images used in the blocks should be high-quality and visually appealing, with the option to add one or two lines of short descriptive text underneath the image to provide more information (00:20:14).
- The overall goal of using image blocks is to grab the user’s attention and make them want to click into the linked page, allowing for a more controlled navigational experience (00:20:20).
Benefits of Image Blocks (00:21:01)
- Utilizing image blocks on a website helps to simplify the navigation experience for users by reducing the need to go through all the menu links in the main menu, footer, or internal links throughout the page (00:21:01).
- Image blocks create an interactive experience with a visually appealing design, making it more engaging for users and encouraging them to click more throughout the website (00:21:21).
- The use of image blocks can lead to multiple calls to action, directing users further into the website down a specific navigational pathway, which can help reduce bounce rates (00:21:27).
- By encouraging users to click more throughout the website, image blocks can also help with Search engine optimization by internally linking to more pages on the website, signaling to Google the strongest web pages (00:21:40).
- The internal linking of pages through image blocks helps to identify the most important pages on the website, as the pages that are linked to most are considered the strongest (00:21:51).
- The term “click candy” was coined to describe the engaging and interactive nature of image blocks, similar to the concept of “I candy”, making the website more engaging and user-friendly (00:22:06).
Common Placements for Image Blocks (00:22:09)
- The most common placement for image blocks is on the homepage, where they can be used to make it clear what the strongest sections of the website are and where users should go, (00:22:10).
- Image blocks can also be used to link to categories for various post types and member categories, and their utilization depends on the type of website and its ultimate goal, (00:22:41).
- These blocks can be added to search result pages, such as post search result pages or member search result pages, to highlight specific categories, posts, or members, (00:23:11).
- Image blocks can be used on pricing pages or membership options pages to segment different membership plans and create a navigational pathway for users, (00:23:27).
- They can also be used on static landing pages to visually highlight and direct users to specific sections of the website, (00:24:26).
- Image blocks can be used to create a funnel that directs users to specific pages, such as checkout or join pages, based on their selection, (00:24:05).
- The use of image blocks can help to make the website more navigational and easier for users to find what they are looking for, (00:25:00).
Let’s See Image Blocks in Use (00:25:03)
- The concept of image blocks is a powerful and simple tool that is often underutilized by users, who may not know what to put in the square blocks, and can be used to improve the navigational experience for users (00:25:03).
- Image blocks can make a website more engaging and fun to use, as they provide a sense of accomplishment and allow users to achieve small milestones and goals, such as finding the events section of a site (00:25:30).
- The use of image blocks can also have Search engine optimization benefits, as it signals to Google what the strongest pages are and Google loves internal linking, which can help reduce bounce rates and improve search engine ranking positions (00:25:52).
- A sample site was created to demonstrate the use of image blocks, with three links on the homepage, including “browse the network”, “become a member”, and “everything Boston”, which can be used to provide a portal experience for users (00:26:34).
- The image blocks can be customized to have different layouts, such as titles above the image, or just images with text embedded in the image, and can be used to link to different categories or pages on the site (00:27:01).
- The use of image blocks can provide a win for users, making them feel like they are entering a portal, and can be used to create a sense of click candy, where users are more inclined to click on something that looks fun, friendly, or interesting (00:28:14).
- The sample site includes a section for events, with three categories of events, including sporting events, music concerts, and business conferences, which can be linked to from the image blocks (00:27:58).
- The process of getting links to search results pages is demonstrated by conducting a search on the demo bootstrap site, and the resulting URL can be used to link an image or button in the text editor (00:28:49).
- A membership site has two membership plans, General users and Pro users, with the General users plan being free to join and the Pro users plan costing $2 per month, and both plans can have their images and buttons linked to the checkout pages (00:29:36).
- A third option on the membership page is to advertise on the website, which offers three ways to advertise: Banner ad spots, sponsored email blasts, and paid social mentions, and image blocks are used to display this content in a simple and organized way (00:30:06).
- The advertising options page can be accessed from the join page, and it provides information on the different advertising options available, including banner ad spots, sponsored email blasts, and paid social mentions, and these options can be linked to landing pages with more information (00:30:20).
- The use of image blocks on the homepage of the classified theme allows for a simple and organized design, with an asymmetrical layout and high-quality images, and this design can provide a good user experience without requiring advanced web design skills (00:31:37).
- The classified theme has been redesigned to use image blocks as the staple of the homepage sections, and this design uses a combination of single and multiple image blocks with descriptions to create a visually appealing and easy-to-navigate page (00:31:44).
- A sample site was created with a page called “private” and a public page for demo purposes, showcasing what members can access when they sign up, including videos, courses, news, updates, exclusive events, jobs board, photo albums, and member directory (00:32:35).
- The portal page is protected, requiring members to log in or sign up, and features a hero section with a title, background image, and six linked images that correspond to different categories, all designed to pique the interest of potential members (00:32:45).
- The page is intentionally simple, with just a hero section, title text, and six images, but it effectively teases the content available to members and encourages them to sign up by hitting a paywall when they try to access protected pages (00:33:32).
- The images on the page are linked, but for demo purposes, they do not lead to actual protected pages, instead, they are meant to demonstrate how the page would work if it were a real membership site (00:33:11).
- The goal of the page is to encourage people to sign up by showing them what they can access as members, and the simple design is intended to make it easy for potential members to see the benefits of joining (00:33:27).
How to Use & Create Image Blocks (00:33:42)
- The image blocks feature is highly underutilized, and its potential can be leveraged to create engaging web pages with various layouts and designs (00:33:43).
- Users can create a layout and then clone the web page to create an alternate page that focuses on something else, allowing for flexibility and efficiency in webpage creation (00:33:53).
- The three-column feature list can be used to create a layout, and users can customize the titles, text, and images to suit their needs, with options to remove or keep the text as desired (00:34:17).
- Images can be sourced from Pexels, and users can search for specific themes, such as people on laptops or singers, and filter by orientation, such as square, to find suitable images (00:34:35).
- Square images can be converted into perfect circles by applying a style, and images can be linked to a URL, with options to enlarge or shrink on hover, adding a touch of interactivity to the webpage (00:35:24).
- The premium content blocks add-on unlocks a wealth of other layouts and features, allowing users to swap out images and customize their web pages with more advanced options (00:35:57).
- Various layouts, such as teams or categories, can be used and customized to fit different purposes, and users can easily change the focus of the layout to suit their needs (00:36:26).
- The image blocks feature is relatively self-explanatory, and users can experiment with different layouts and designs to create engaging and effective web pages (00:37:01).
Add Custom Content, Banners & SEO Value To Search Result Pages (00:37:05)
- To enhance search result pages, it is possible to turn them into static pages, such as a page for Los Angeles members, and add custom content, which can be learned from a previous webinar, and this process can start to be understood from (00:37:05).
- Adding image blocks to these pages can help link to relevant content, such as events, deals, and job listings, in a more visually appealing way than plain text links, and this can be particularly effective for pages like the Los Angeles members page (00:37:18).
- Using image blocks, also referred to as “click candy,” can grab users’ attention and encourage them to explore the site further, which is important for building user confidence and making the site easy to navigate, as discussed from (00:37:45).
- A simple and clear navigation is key to encouraging users to explore the site, and having a lot of clutter on the site can be overwhelming, so it is essential to strike a balance between providing useful content and avoiding clutter, which is a point that becomes clearer from (00:38:08).
- The ability to add custom content and image blocks is a useful tool that can be used on various pages, including the home page, and having a “portal mentality” can enhance the user experience, which is a concept that starts to be explained from (00:38:28).
- The idea of “click candy” is also mentioned in the context of domain names, with the example of the domain name “Candy” being available for $122,000, which is a side note that is mentioned from (00:39:00).
How many stock photos are available in the library? (00:39:15)
- The library currently has approximately three million images from Pexels, and the plan is to sync up with two other solutions to enhance the user search experience and include their libraries as well (00:39:15).
- The integration with Pexels is the initial focus, but there are plans to incorporate two other major integrations to create one big library where users can search and get results from all the libraries or choose between them (00:39:42).
- The current library has a wide range of images to choose from, although some may be redundant or limited, making it a valuable feature for Search engine optimization and creating continuity throughout a site (00:39:58).
- Having a single source for images can help solve the challenge of pulling images from different sources, resulting in a more uniform look (00:40:18).
How to change Twitter share icons to X? (00:40:24)
- To change the Twitter share icon to the X icon on a website, the issue is that the share buttons are rendered from iframes and still use the old Tweet button with the bird icon (00:40:25).
- The reason for not switching to the X icon yet is that Twitter hasn’t updated their tweet button, and it seems like they are using both the old and new icons, so it’s best to wait for them to update their assets and sources (00:41:04).
- However, it is possible to edit the widget and swap out the old icon with the X image, but this requires having the X icon and using JQuery to make the changes (00:41:50).
- Another option is to use a code snippet to swap out the icon, which can be done by uploading the X icon to the site and replacing the old icon, and this will handle the change on profile pages without editing the widget (00:43:00).
- If further assistance is needed, it’s recommended to ask in the Facebook group for a more detailed and appropriate answer (00:43:13).
How to set location search radius? (00:43:55)
- To set a location search radius, a widget can be added to the sidebar, which may help with searching within a specific miles radius of a location (00:43:57).
- The widget can be found in the sidebar manager under the member search results, where a search for “radius” or “local radius search” can be done to find the relevant widget (00:44:36).
- The search by location feature allows input of a radius of up to 100 miles, enabling a radius search based on the specified location (00:44:51).
- To use this feature, the member search results sidebar in the sidebar manager needs to be customized, and the radius widget needs to be added, which can then be used to search for members within a specific radius (00:45:09).
- The widget supports a location radius search, and a test search can be done by inputting a location, such as a zip code, and a radius, such as 5 miles, to find members within that radius (00:45:25).
- The search results will show members who are within the specified radius of the input location, demonstrating the basic radius search functionality (00:45:32).
How to remove members’ street addresses from member search result page? (00:45:44)
- The discussion is about a member search result page, and it is noted that there are no addresses on this page, which raises the question of whether it is possible to add addresses to this page, and the answer is that it is possible to add addresses, but it would require editing the post type, (00:45:44).
- To add the full address, the edit post type for that would need to be modified, and the variable name for the address is “address one”, which can be added to the page loop of the search results page, (00:45:52).
- The process of adding the address variable to the search results page is demonstrated on a test site, and it is shown that adding “address one” to the page loop will display the user’s address on the search results page, (00:46:41).
- The variable “address one” is the key to displaying the user’s address, and it can be used to customize the search results page to include the address information, (00:46:51).
- Assistance is offered to help with implementing this solution, including following up on the Facebook group to get the updated code for the site, (00:47:16).
- The question about adding addresses to the search results page comes from Carmen, and the solution is provided as a potential answer to her question, (00:47:29).
Bookmark My Favorites text labels? (00:47:32)
- The option to have alternative text labels for the bookmarks feature was previously available, allowing the text to change from “save to favorites” to “saved” when a user clicked on it (00:47:37).
- To check the text labels, users can go to settings and look for “my favorites” and “bookmark” labels, which may have different options for plural or count versions (00:48:08).
- There is only one text label for “bookmark” when there is a count or plural version, and users may want to experiment with these labels to see how they change after a post is liked or unliked (00:48:25).
- The webinar replay will be available in the Facebook group, and users are encouraged to use image blocks throughout their site for design, navigation, and simplifying the flow of their website (00:48:47).
- Image blocks can be used for various purposes, such as linking to different post types, creating private member portals, and linking to membership plan options (00:49:00).
- The next webinar will be in two weeks, and the replay will be available in the Facebook group for those who may have missed something or want to recap (00:49:31).
- The Brilliant Directories family appreciates the contributions and suggestions from users, which help with lab updates, and they look forward to seeing users in the next webinar (00:49:45).